Plans for building a PVC flagpole
...or, Flying the flag at Bonnaroo
I
built a portable flagpole for the Bonnaroo festival and I figured I'd
write a quick guide on how I did it. I used the guide that used
to be here
as inspiration but mine is taller and made to be fixed (temporarily) in
the ground rather than carried. Any
questions or suggestions rooguide[at]gmail[dot]com
(replace [at] and [dot] in the
email address). Please feel free to link to this document or
repost it, just check with me first before using it for any commercial
purposes. If you haven't seen it yet, check out my Bonnaroo Survival
Guide. Update:
The flagpole was a big success at Bonnaroo, check the bottom of the
page for pic and more info. Leo
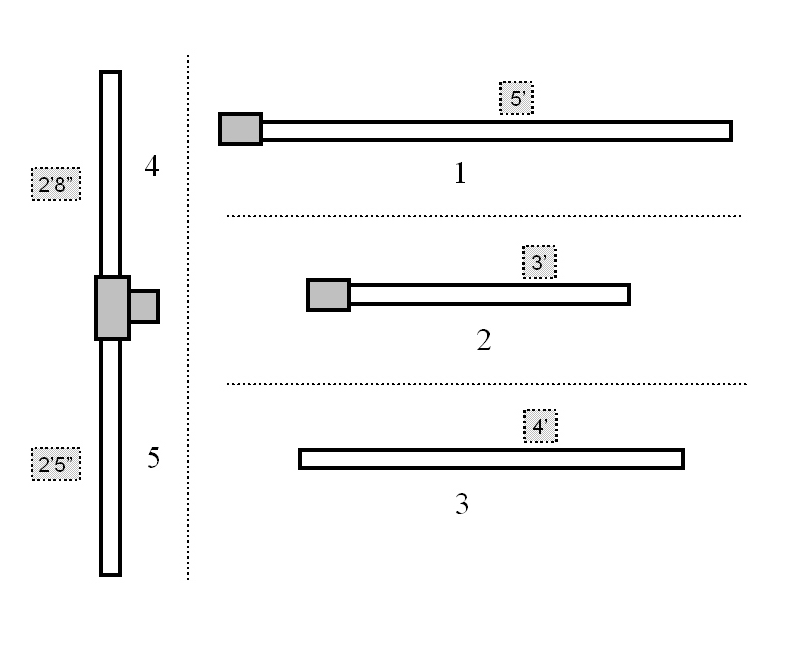
The parts for the pole cost $14 at Home Depot (any hardware store should have them) and construction time (including mistakes and corrections) was about 2 hrs. My original plan was for a 15' pole but that proved to be unstable so I settled for a 12' one instead. That adjustment is the reason the size of some parts are unequal (I chopped length off some of them). These plans are for a flagpole where the flag hangs down (a tall narrow garden type flag), it shouldn't be too hard to adapt them for a horizontal flag.
The parts for the pole cost $14 at Home Depot (any hardware store should have them) and construction time (including mistakes and corrections) was about 2 hrs. My original plan was for a 15' pole but that proved to be unstable so I settled for a 12' one instead. That adjustment is the reason the size of some parts are unequal (I chopped length off some of them). These plans are for a flagpole where the flag hangs down (a tall narrow garden type flag), it shouldn't be too hard to adapt them for a horizontal flag.
Materials
PVC pipe
20' (ft) of 1" (in) schedule 40 (this indicates the wall thickness of the pipe, sched 40 is the most commonly found) PVC pipe - $3.96
10' of 1 1/4" sched 40 PVC pipe - $3.59
PVC fittings
2 - 1" couples - $0.58
1 - 1" T-connector - $0.49
PVC cement
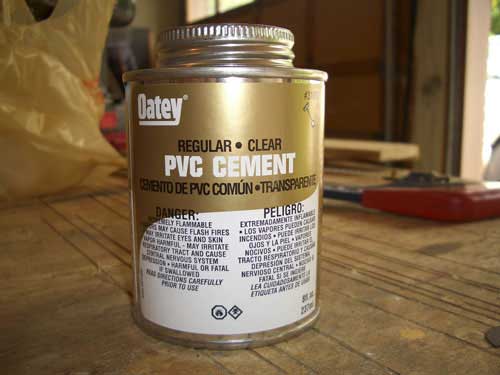
This is glue to join PVC pieces together. - $2.97
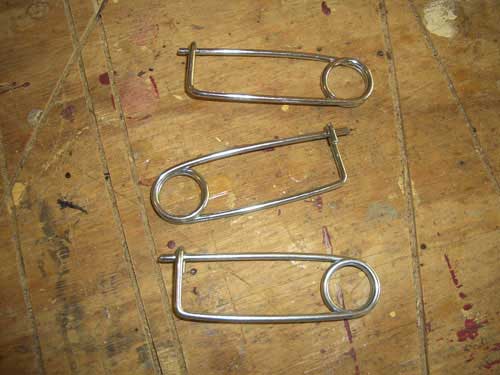
Cotter pins
20' (ft) of 1" (in) schedule 40 (this indicates the wall thickness of the pipe, sched 40 is the most commonly found) PVC pipe - $3.96
10' of 1 1/4" sched 40 PVC pipe - $3.59
PVC fittings
2 - 1" couples - $0.58
1 - 1" T-connector - $0.49
PVC cement
This is glue to join PVC pieces together. - $2.97
Cotter pins
4
cotter pins - $2.40
String or twine
(if you need a picture of string, you may want to consider an easier project)
1/29/05 Added post-roo info,
minor reformatting
String or twine
(if you need a picture of string, you may want to consider an easier project)
Tools
Saw
Drill w/ bits
Hammer
Knife/scissors
Drill w/ bits
Hammer
Knife/scissors
Plans
Here's
a general guideline for the flagpole, in the text the pieces will be
referred to in italics, i.e. 1.
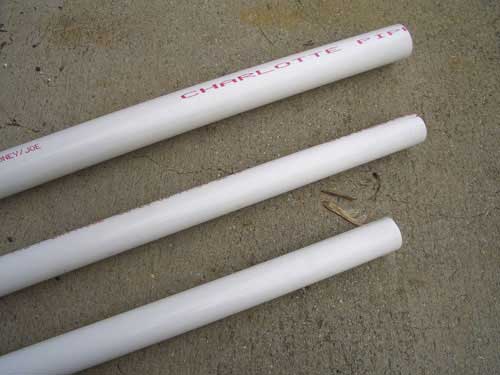
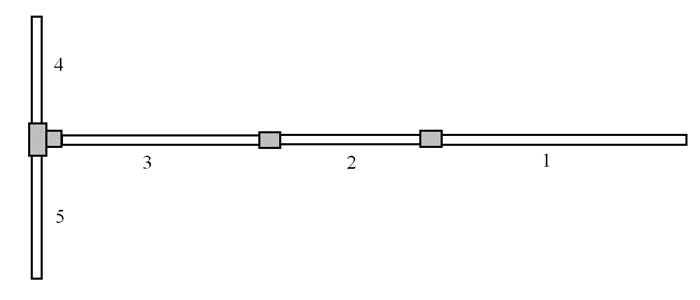
Cut
the 1" PVC into 5 pieces; 5', 3', 4', 2'8" and 2'5". You may
want to label the pieces now to keep from mixing them up, I also put
"B" and "T" (bottom and top) on either end of pieces 1,2
& 3.
Cut the 1 1/4" PVC into a 5' length with one angled end, this will be
the base
(the angle will help when you drive it into the ground). I
cut the PVC w/ a hacksaw, a dremel would work, PVC is relatively soft
stuff so it shouldn't be difficult.
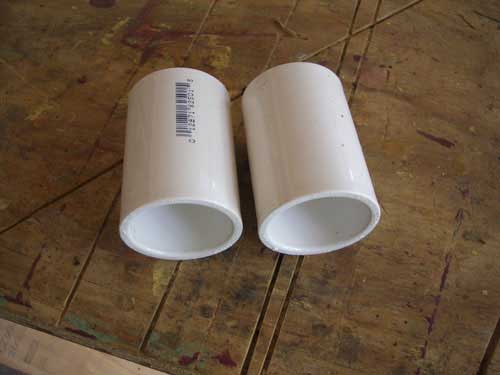
Glue connectors to the top end of pieces 1 & 2. Brush the cement on the pipe and the inside of one half of each connector. The cement give off a large volume of fumes, make sure you have PLENTY of ventilation.
(the instructions for the cement may say to use primer on the PVC before gluing, we don't need to do this as the pipe won't need to stand up to water pressure)
Push the connectors onto the pipe, making sure they seat all the way down.

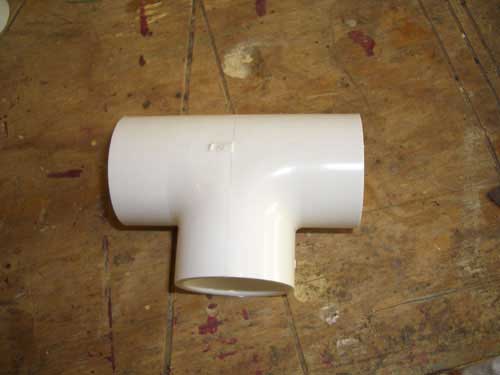
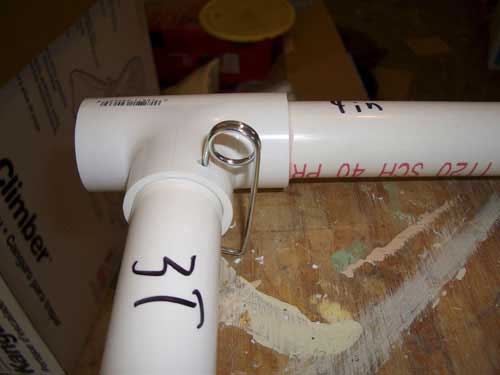
Glue and join pieces 4 & 5 using the "T" connector (see the blueprint above). Piece 5 is there to serve as a counterweight to 4 which will have the flag on it. If you want you could fly another flag on 5, or use it to hang a lightstick to see at night.
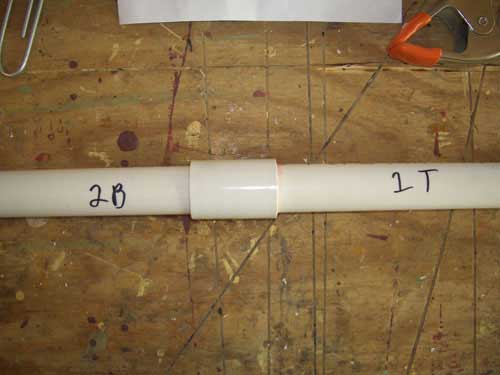
Wait ~15 min for the cement to cure, then join but do not glue pieces 1 & 2, making sure they are pushed together as far as they will go.
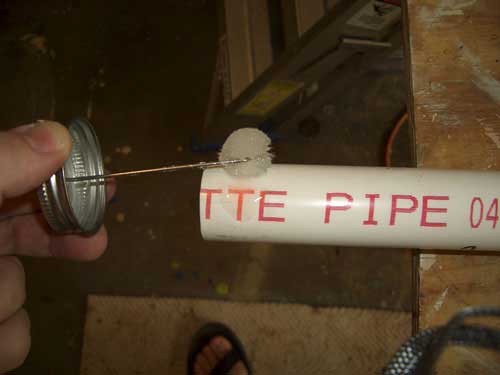
Drill a hole through the connector and piece 2 off center.
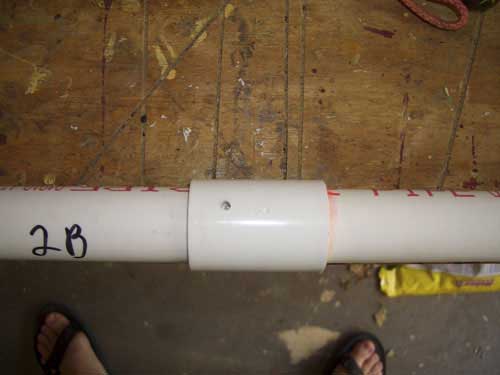
The hole was drilled off center so that a cotter pin could easily be inserted.
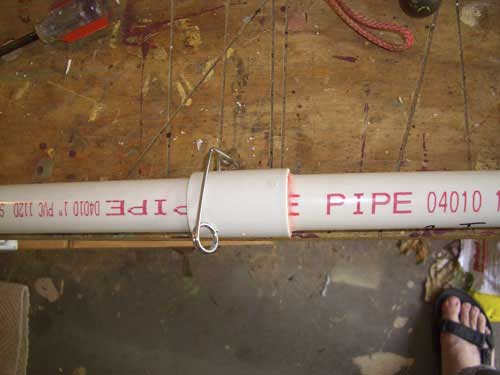
This will hold the pieces together but allow them to be disassembled when needed. Repeat the above procedure for pieces 2 & 3 (it may be easiest if you take 1 & 2 apart first. Then repeat with 3 and the "T" connector (in the pic below 5 is not glued into the "T" as I did steps out of order).
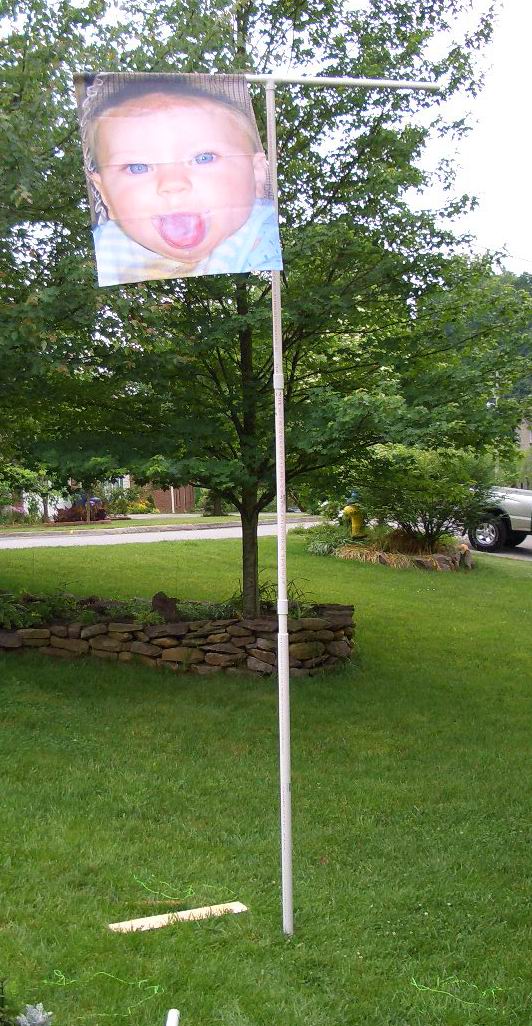
Drill a hole through both ends of piece 4, then run a string between them. This will secure the flag.
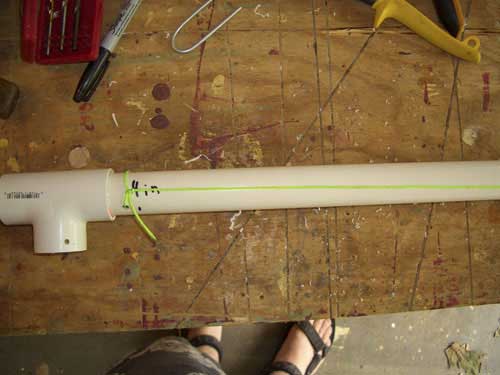

Thread the flag onto piece 4 underneath the string, then tie the sting over the flag so that the flag can't slide off. The pieces can then be assembled.
Glue connectors to the top end of pieces 1 & 2. Brush the cement on the pipe and the inside of one half of each connector. The cement give off a large volume of fumes, make sure you have PLENTY of ventilation.
(the instructions for the cement may say to use primer on the PVC before gluing, we don't need to do this as the pipe won't need to stand up to water pressure)
Push the connectors onto the pipe, making sure they seat all the way down.
Glue and join pieces 4 & 5 using the "T" connector (see the blueprint above). Piece 5 is there to serve as a counterweight to 4 which will have the flag on it. If you want you could fly another flag on 5, or use it to hang a lightstick to see at night.
Wait ~15 min for the cement to cure, then join but do not glue pieces 1 & 2, making sure they are pushed together as far as they will go.
Drill a hole through the connector and piece 2 off center.
The hole was drilled off center so that a cotter pin could easily be inserted.
This will hold the pieces together but allow them to be disassembled when needed. Repeat the above procedure for pieces 2 & 3 (it may be easiest if you take 1 & 2 apart first. Then repeat with 3 and the "T" connector (in the pic below 5 is not glued into the "T" as I did steps out of order).
Drill a hole through both ends of piece 4, then run a string between them. This will secure the flag.
Thread the flag onto piece 4 underneath the string, then tie the sting over the flag so that the flag can't slide off. The pieces can then be assembled.
Putting the flag
up
Hammer
the base
piece into the ground. Use either a soft mallet or hold
(carefully) a piece of wood on top of the base when you hammer so as
not to damage the PVC. You will want to hammer it at least
6" into the ground, going deeper will make it sturdier. Slide
the pole into the base.
Other
stuff
When
I was building the pole I experimented with a taller pole stabilized
with 3 guy wires running from about halfway up, angled down and secured
with stakes. While it helped, they were scrapped as it would
take only one person falling into one at night to take the flagpole
down.
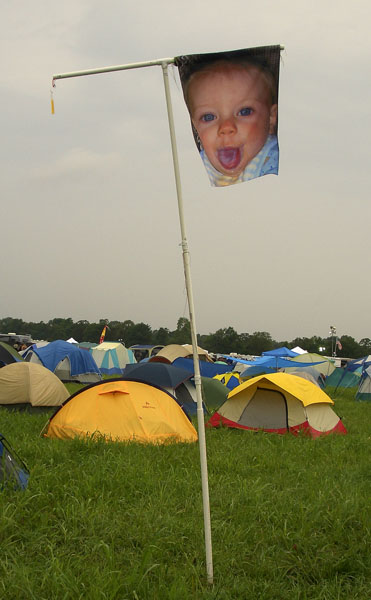
The flag worked great at Bonnaroo! It was visible from quite a distance and made getting back to the campsite a breeze. Lots of people came up and said how much it helped them get their bearings as well. The flagpole withstood the winds well, I temporarily took it down when it really got windy. The flag did have a tendancy to bunch up on the crossbar, next time I'll use a couple of safety pins to keep it stretched out. I might also sew/pin a couple of metal washers to the bottom so that it hangs down better in a breeze.
I bought the flag from Windsensations for ~$40, they can make a custom flag from a digital photo. Mine took about 2 1/2 weeks to come and they did a very nice job.
The flagpole, while reasonably sturdy, should probably be taken down if possible in a storm or in high winds just to be on the safe side.
5/23/05
Original version posted.
5/24/05 Explained the purpose of piece 5.
5/24/05 Explained the purpose of piece 5.